I’m just starting to create products with my art. I ordered a couple samples to see if I did it right.
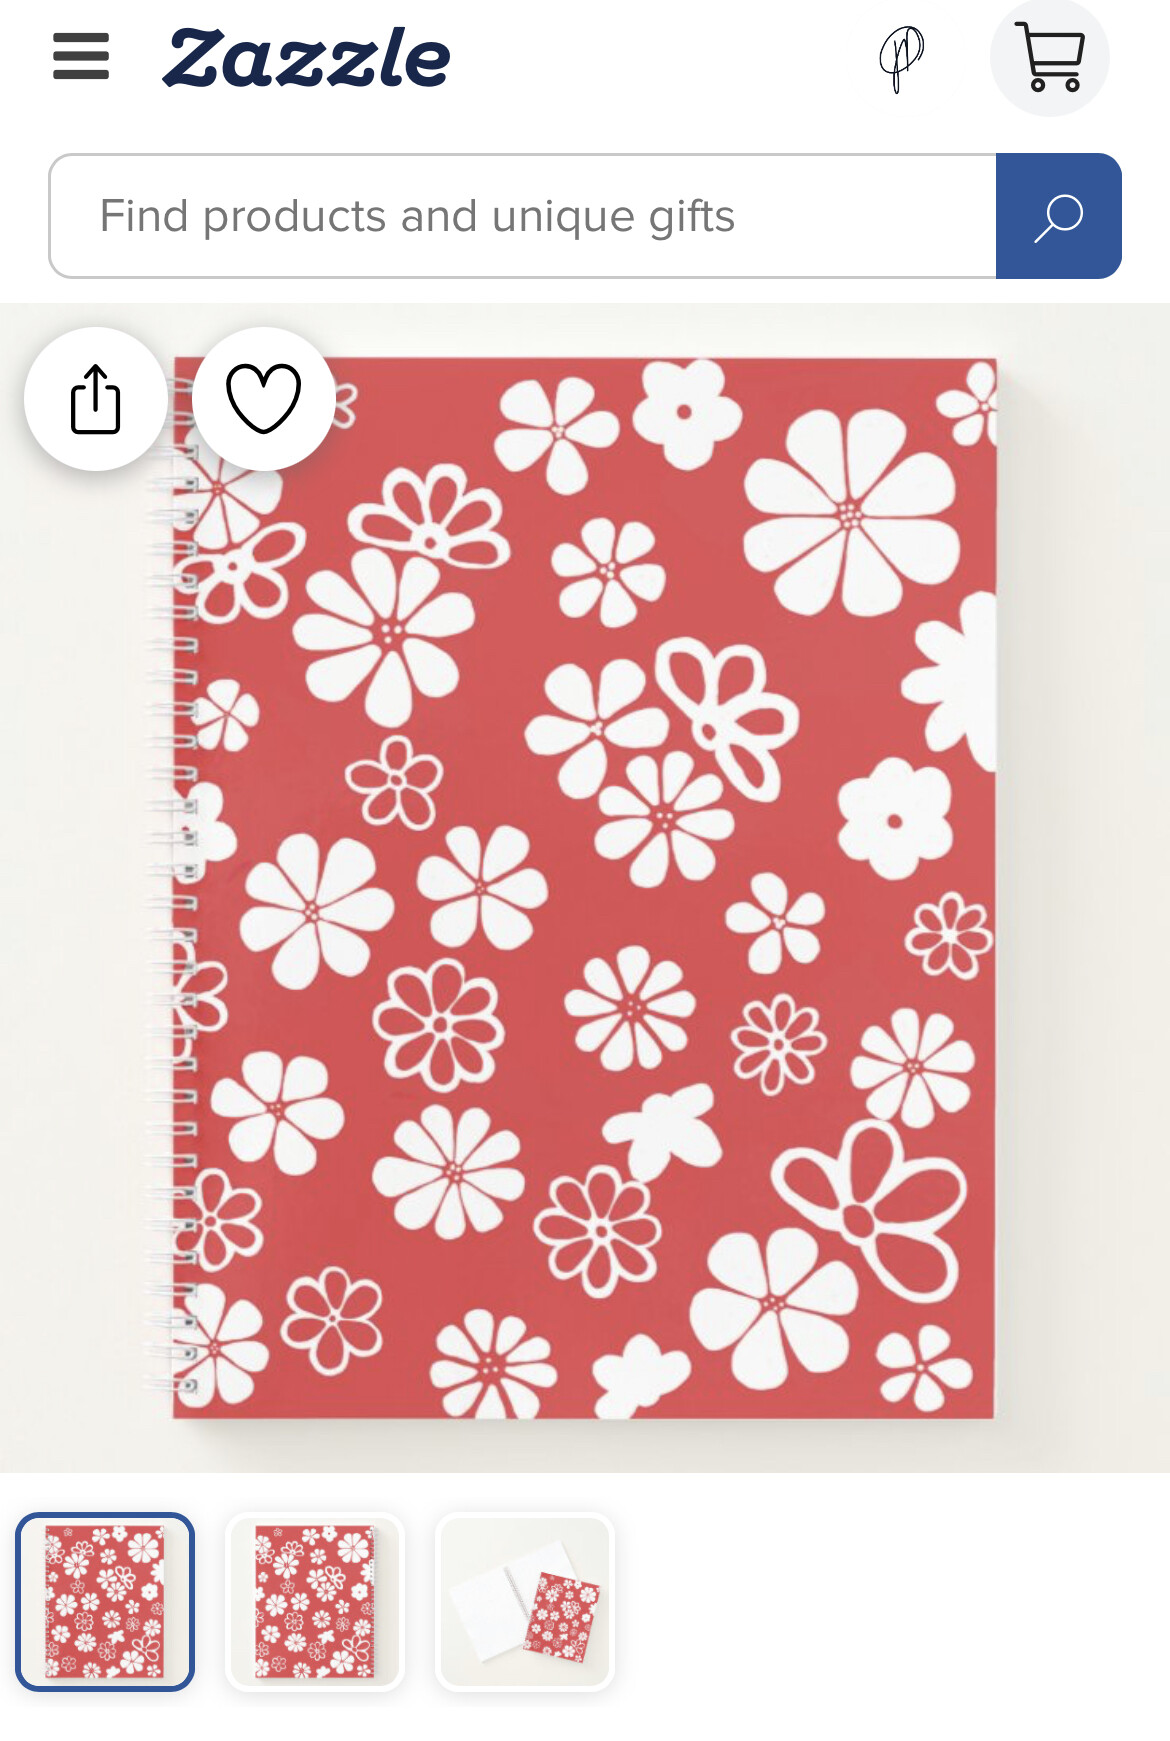
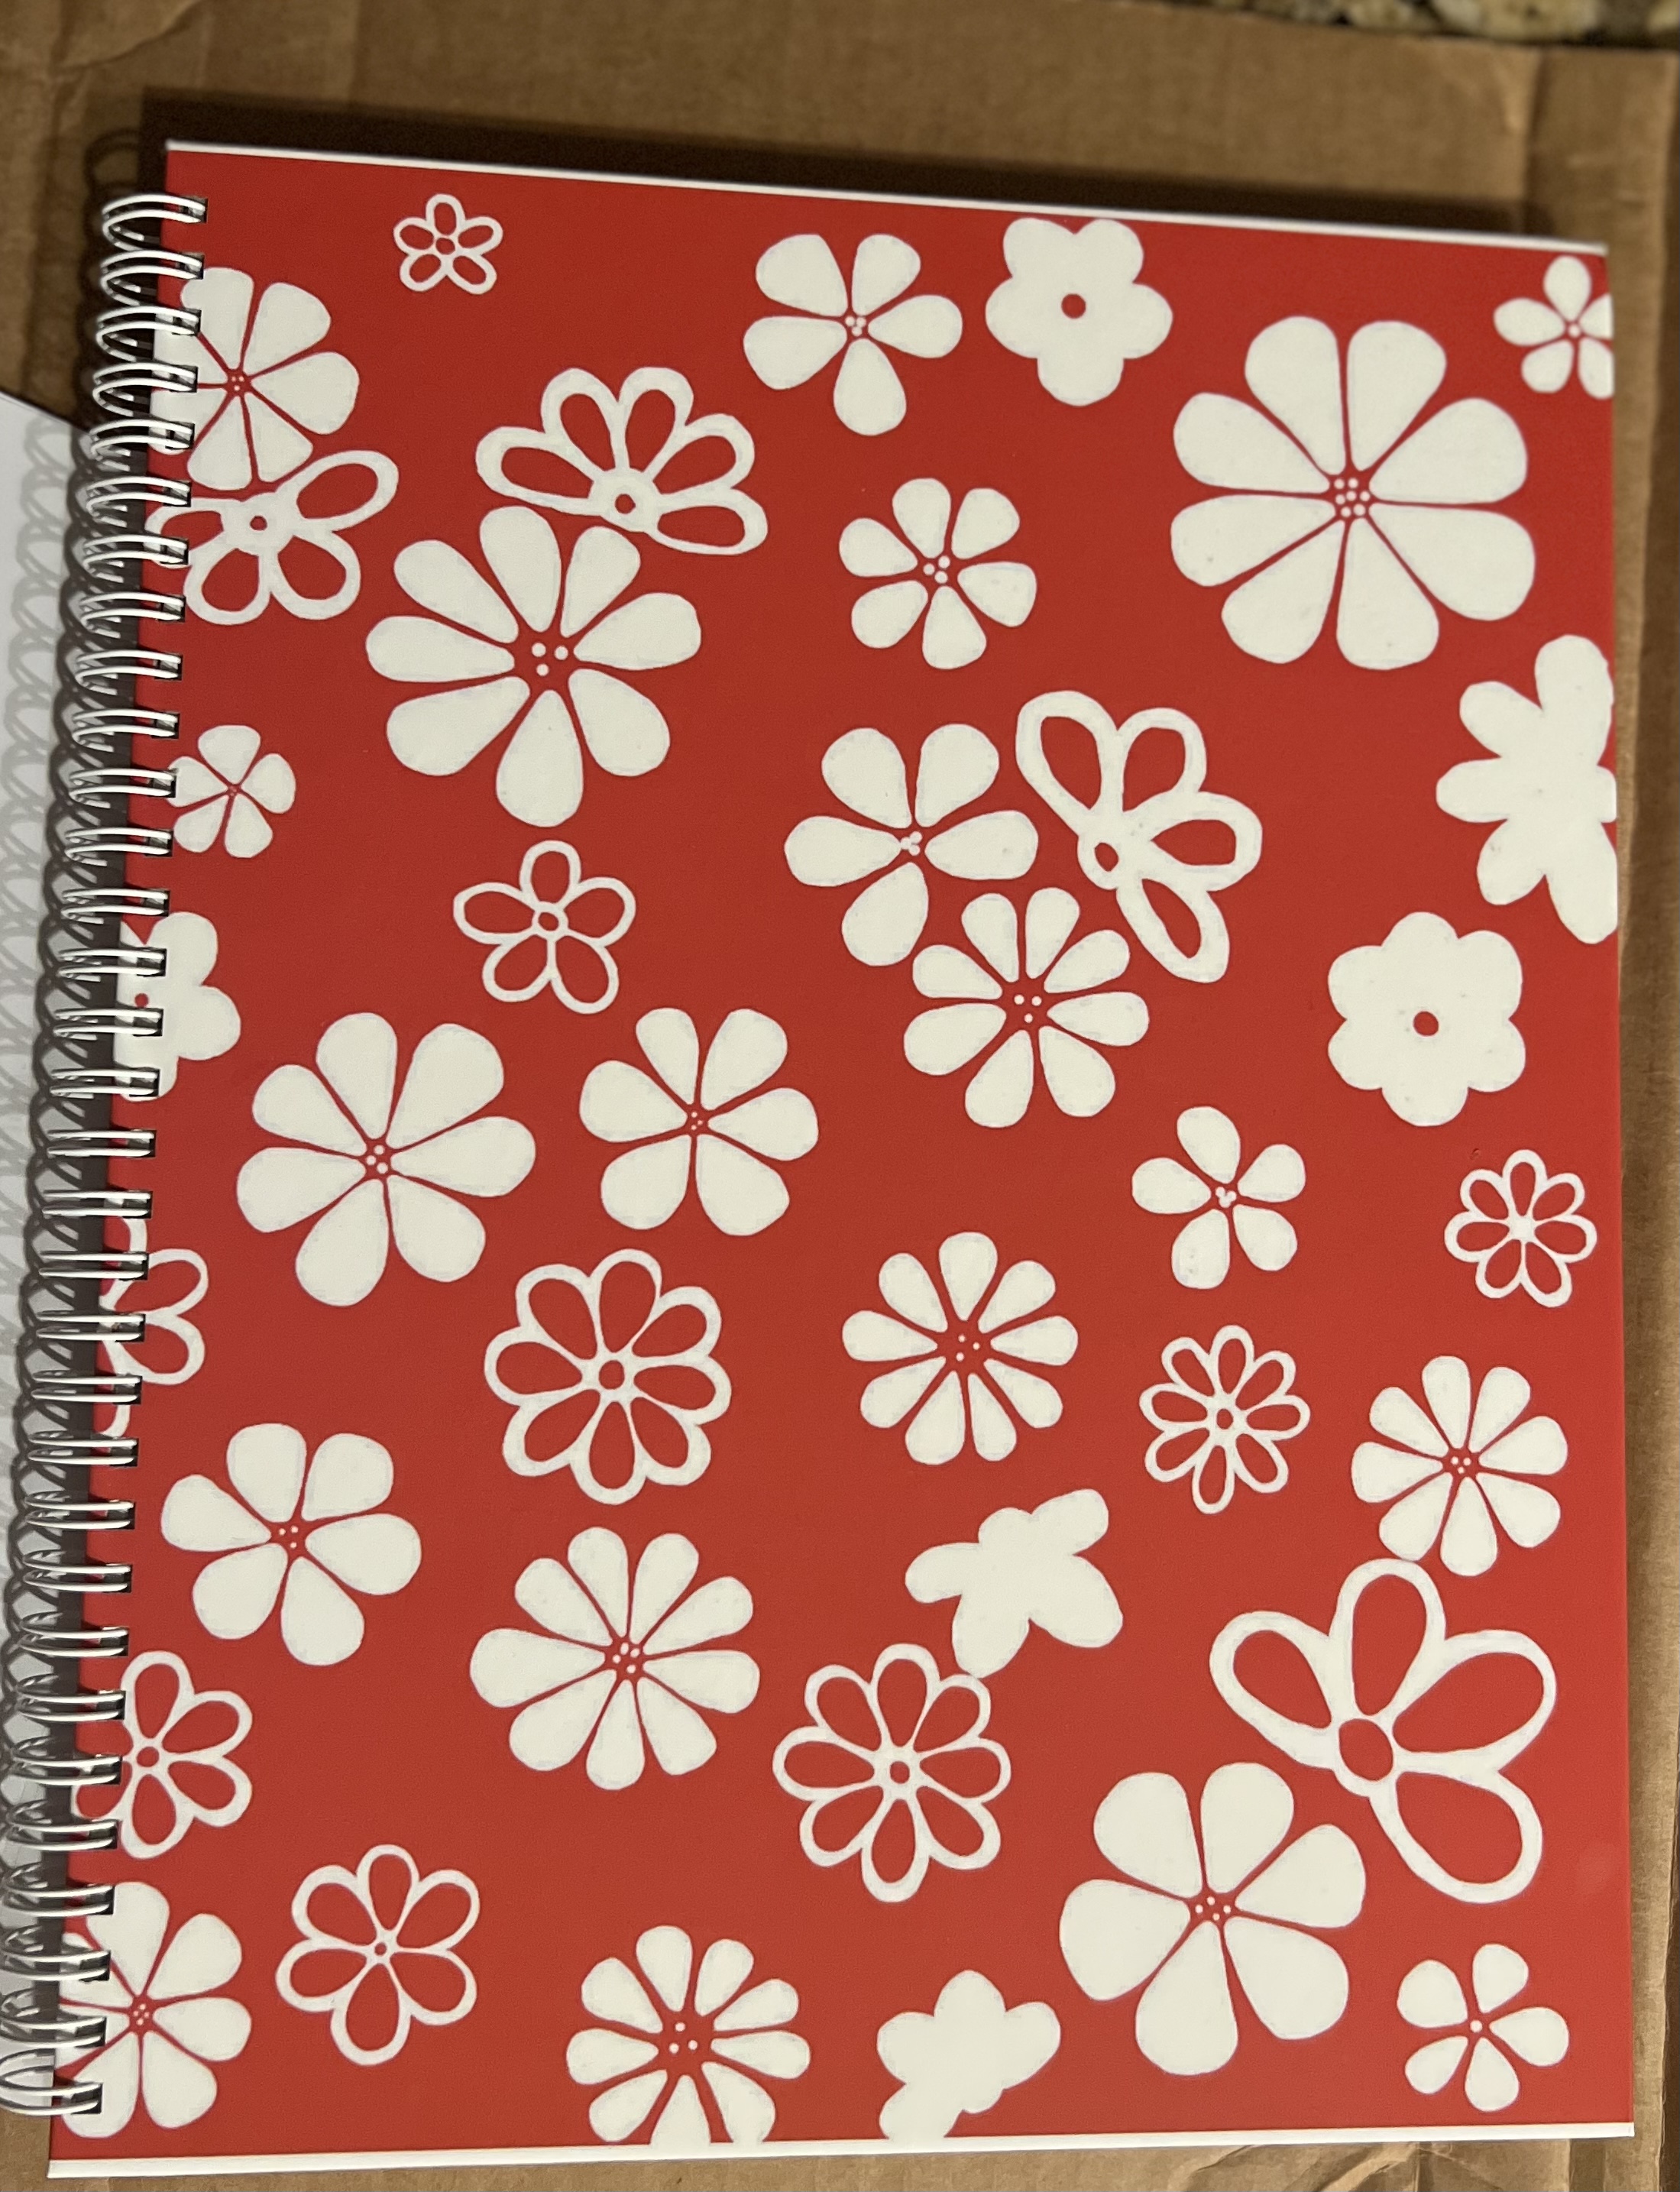
the preview doesn’t show a white line at the top and bottom of cover - but they printed that way.
What can I do to avoid this to happening to others?
see photos 1 of Zazzle preview and then 1 of the product I received.
thanks in advance for your help!
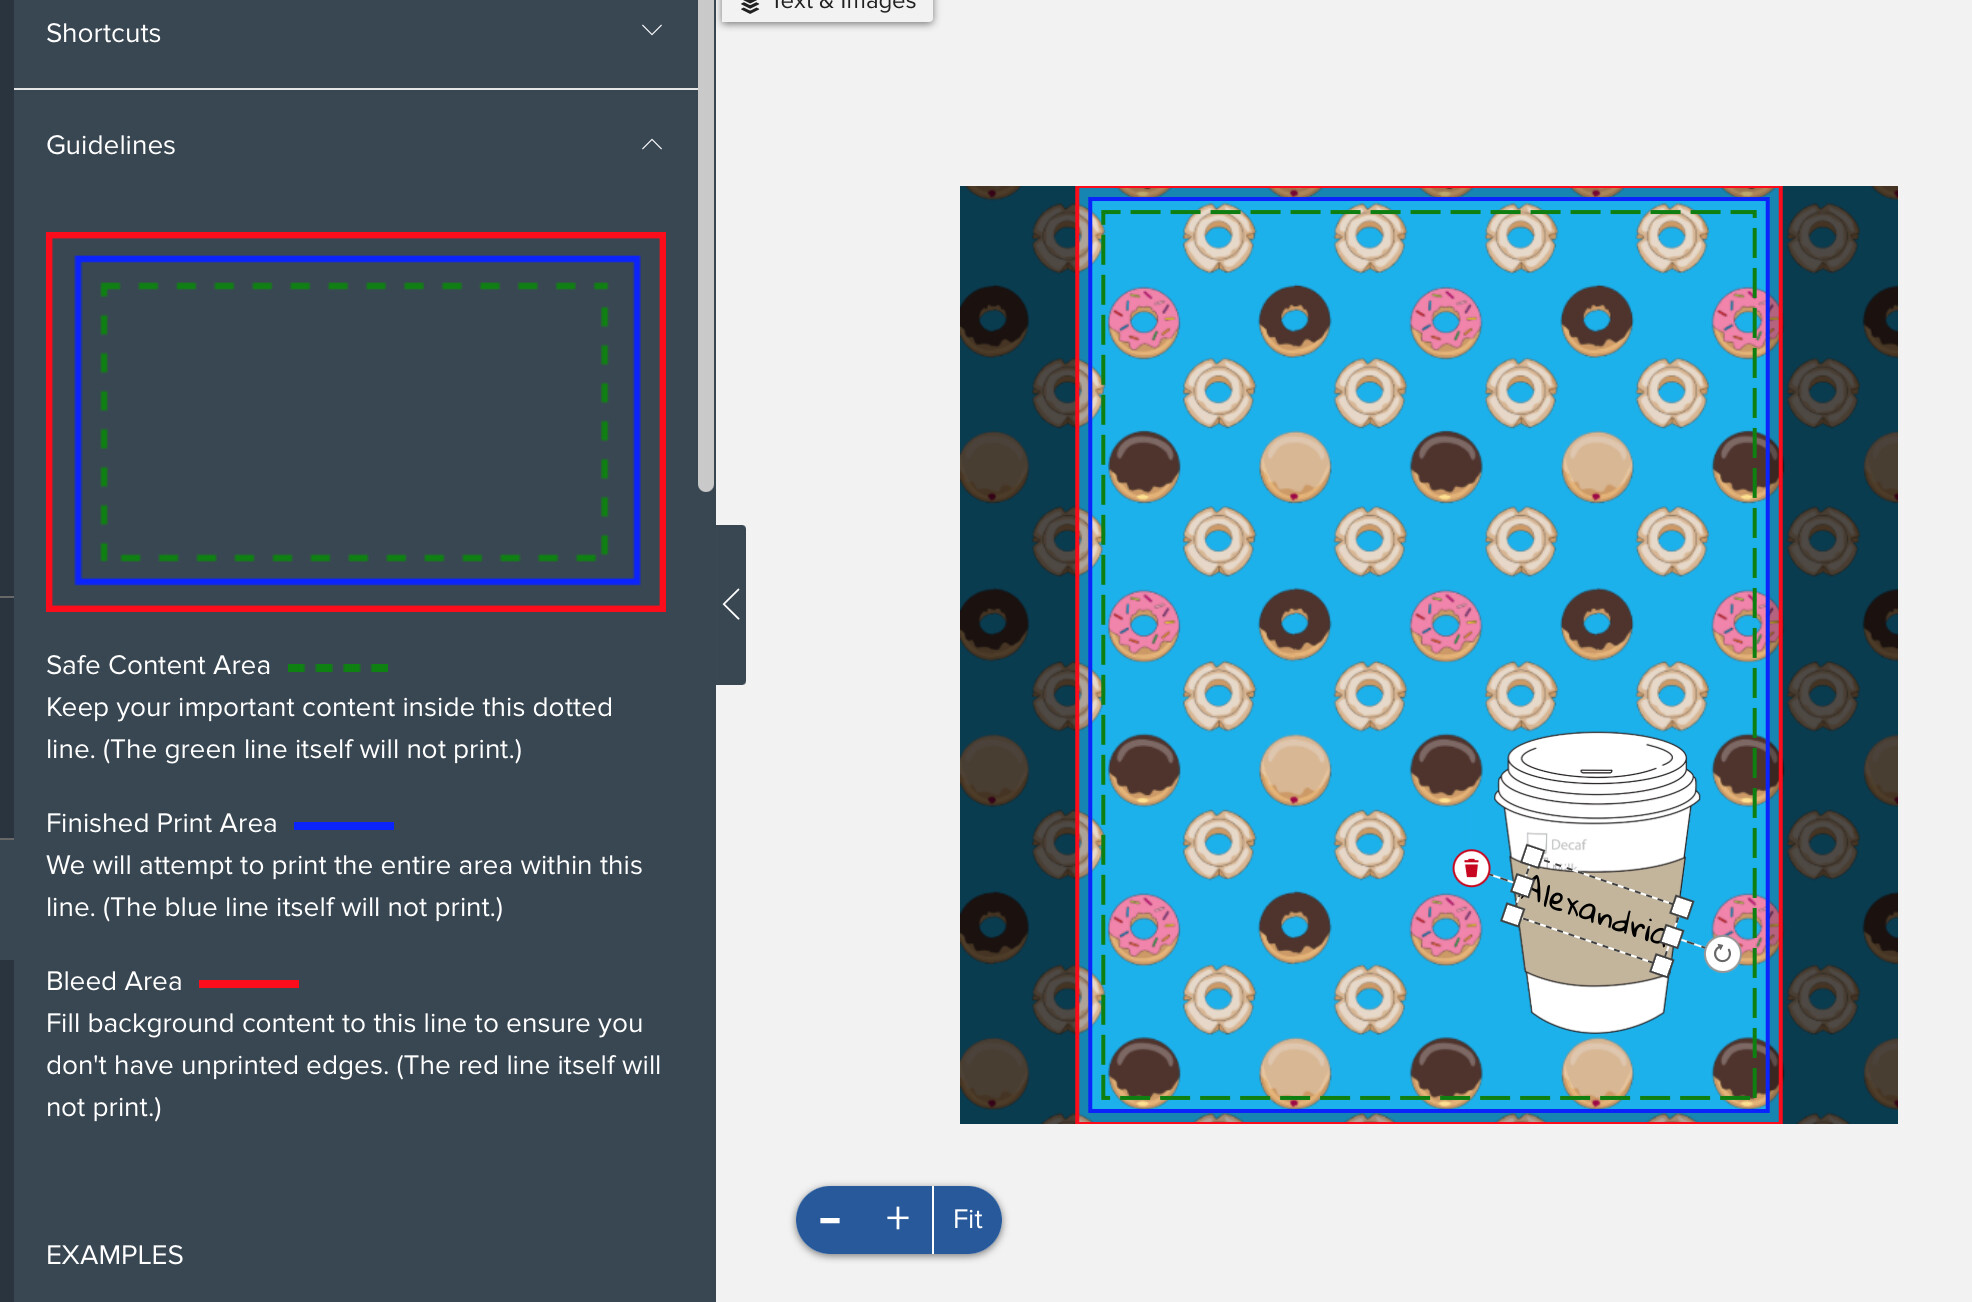
Can you post a link to the actual product? Without being able to look at it in the design tool we can only guess at what the problem is… My _guess _is that your artwork does not extend to the bleed (red) line… that would be the most likely cause… It should look as below. The image will be printed larger than the finished product (red line) then cut down to size (blue line), That cutting is not guaranteed to be exact, but will be within the tolerances of the safe area (green line). Any white inside of that red box and you risk having a white edge on your finished product.
Thank you so much for your help and response. I have played a bit with the first but included a second I haven’t touched yet. perhaps that’s where I thought I had extended it - but need to be mor mindful of the bleed line.
Both links go to products set as hidden, which none of us can see. If you don’t want them public but want us to see them, set them to direct only, which means only those to whom you’ve given the link can see the product.
Thank you. I’ll have you take a look at this one that I re-did yesterday to see if you think it should turn out okay. I’ll get the others moved over from my private to direct as well.
MOLESKINE® Notebook Cover https://www.zazzle.com/z/v45lqc0p?rf=238304100963657691#ZazzleMade
Obviously, I’m new and have a lot to learn.
Hmmm. Thank you. I’ll look into that after I solve this one. I can’t wait until I become comfortable with the platform. Practicing…
Do these work? I just marked these as direct and put them up in my store.
You are going to want to fill that entire space with the red border with artwork so that there is enough “bleed” to accommodate some typical/standard wiggle room in production AND so that if a customer selects a different size notebook, the art will work with that as well.
I see you already took down the products for those links, but just in case you haven’t noticed it, you have a choice of “Fit” or “Fill” for any of your images. You should play with them a bit to see how they operate. Fill generally enlarges the image to the bleed lines on all four sides, and Fit sets the top and bottom of the image to fit within the print area. Once you’ve set an image with one or the other, you may have to do adjustments to size and position.
When you’re using a full frame image like that, it’s always best to use the “fill” feature rather than sizing it by hand, because that way it will expand to fill the entire space even if the customer chooses a bigger size. If you size it by hand, it won’t expand for a bigger size - at least I don’t think it will.