- Mark as New
- Bookmark
- Subscribe
- Mute
- Subscribe to RSS Feed
- Permalink
- Report Inappropriate Content
02-28-2023 12:47 PM
Good afternoon Designers! I would love to hear your design process. Do you design totally in the Z design tool? I typically set up my design in In Design with any special text such as "Bridal Shower" and graphics. I export the layers and bring them into the design tool and add the editable text. I would love to know your process. Thank you! I feel like I should be moving faster.
Beverly
Solved! Go to Solution.
- Mark as New
- Bookmark
- Subscribe
- Mute
- Subscribe to RSS Feed
- Permalink
- Report Inappropriate Content
02-28-2023 03:37 PM
This is my workflow.
1. Open up all elements and graphics I plan to use in Photoshop.
2. Make any required adjustments such as colors & if needed put together individual elements.
3. Save all graphics I need as PNG files. If it is something that needs to be together such as a floral arrangement then I save them all together in one PNG. It depends on the graphic and what I will be using it for. Sometimes I will group flowers only and upload the leaves individually so that I can have more flexibility with the final layout.
4. Import into the Zazzle design tool and use as required.
I find it is easier this way. In the past I would design the whole thing in Photoshop and then add the text in the design tool but I would find that sometimes the text wouldn't fit due to the graphics and it was difficult to move them around. I would have to go back into Photoshop and change things and then re-upload.
This way with individual PNGs it is easier to use them on different products especially if making matching products for a collection.
- Mark as New
- Bookmark
- Subscribe
- Mute
- Subscribe to RSS Feed
- Permalink
- Report Inappropriate Content
02-28-2023 01:26 PM - edited 02-28-2023 01:29 PM
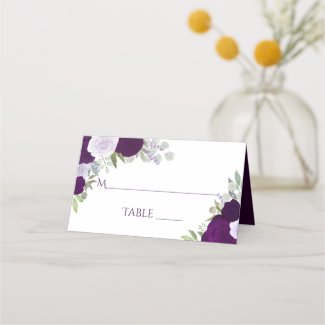
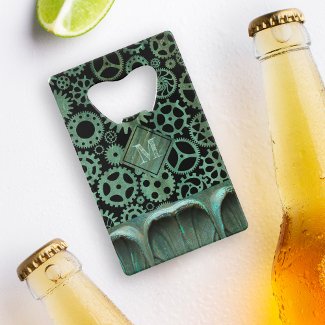
I do most of my work in the Zazzle design tool. I find it too complicated to try to position all of the graphics in my design software and then hope that they'll fit with the text once I import them into Zazzle. So I just upload all of my graphic elements as separate images and then I position and group them within the Zazzle design tool as needed for the particular design I'm working on.
For example, in this product, each flower and sprig of leaves is a separate file. Doing it this way I can easily re-position them for the needs of the product in question. If I did it the other way around, I'd be stuck trying to make the text fit with the pre-laid out graphics rather than being able to manipulate both on the same screen.
Only disadvantages are that it's sometimes hard to grab the image you want when you've got zillions of them layered in Zazzle's design tool, an also if you try to tile a group that's comprised of a lot of separate images, it ends up being REALLY slow - but that may be because my images are rather large. I do it that way so I don't have to have separate images for small stuff like place cards and big stuff like wall tapestries!
p.s. I use GIMP rather than PhotoShop so there may be tools in PhotoShop that I don't have access to which would make a different system more workable. YMMV!
Cat @ ZB Designs
- Mark as New
- Bookmark
- Subscribe
- Mute
- Subscribe to RSS Feed
- Permalink
- Report Inappropriate Content
03-13-2023 12:14 PM - edited 03-13-2023 12:18 PM
@Cat , You said "my images are rather large", what sizes (pixels) do you normally use?
- Mark as New
- Bookmark
- Subscribe
- Mute
- Subscribe to RSS Feed
- Permalink
- Report Inappropriate Content
03-13-2023 06:42 PM
It depends on how big the original watercolor is. I scan them at the highest resolution my scanner offers, and then keep them as big as I can so I don't have to upload multiple copies for different products. For that design, they range in size from around 1500 pixels to over 7000.
Cat @ ZB Designs
- Mark as New
- Bookmark
- Subscribe
- Mute
- Subscribe to RSS Feed
- Permalink
- Report Inappropriate Content
03-14-2023 09:25 AM
Makes perfect sense. Do you often use fonts that aren't available in Zazzle?
- Mark as New
- Bookmark
- Subscribe
- Mute
- Subscribe to RSS Feed
- Permalink
- Report Inappropriate Content
03-14-2023 10:01 AM
I occasionally use non-Zazzle fonts, but just a word here and there. I find it's easiest to save the word as an svg file so once I import it into Zazzle I can easily change the size and color for different designs.
Cat @ ZB Designs
- Mark as New
- Bookmark
- Subscribe
- Mute
- Subscribe to RSS Feed
- Permalink
- Report Inappropriate Content
02-28-2023 02:01 PM
I lay things out in Photoshop to get a feel for placement and color choice. Then I save each element as a PNG and set them up in the design tool the same way I had set them up in Photoshop.
- Mark as New
- Bookmark
- Subscribe
- Mute
- Subscribe to RSS Feed
- Permalink
- Report Inappropriate Content
02-28-2023 03:11 PM
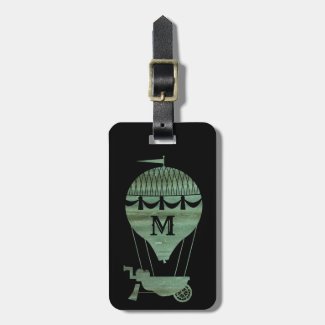
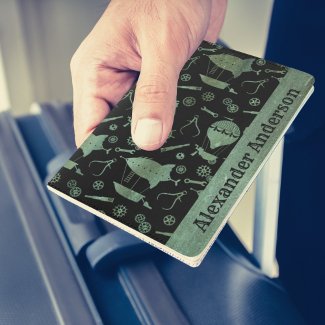
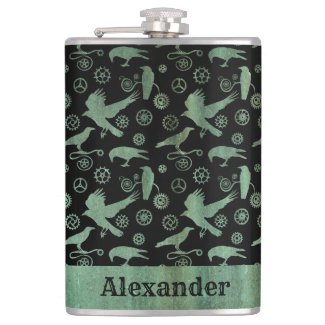
I tend to design elements and do most of the layout in the Zazzle tool. It find gives me a lot of flexibility to tailor designs for differently shaped items and sometimes I even find horizontal markets too.
Here's some examples.


- Mark as New
- Bookmark
- Subscribe
- Mute
- Subscribe to RSS Feed
- Permalink
- Report Inappropriate Content
03-13-2023 05:16 PM
When I posted HTML product links on this forum, they showed up one by one "vertically", but I like the way you posted , one by one "horizontally", as they are much more "eco friendly" - how to do that?
- Mark as New
- Bookmark
- Subscribe
- Mute
- Subscribe to RSS Feed
- Permalink
- Report Inappropriate Content
03-13-2023 05:48 PM - edited 03-13-2023 05:48 PM
You have to put them into a table - you insert the table, then paste the html into the cells in the code window

- Mark as New
- Bookmark
- Subscribe
- Mute
- Subscribe to RSS Feed
- Permalink
- Report Inappropriate Content
03-13-2023 06:53 PM
Do you mean inserting the code between and </td> ?
- Mark as New
- Bookmark
- Subscribe
- Mute
- Subscribe to RSS Feed
- Permalink
- Report Inappropriate Content
03-13-2023 07:32 PM
Yes, each of the <td> </td> pairs defines a table cell the &nsbp is just a space
- Mark as New
- Bookmark
- Subscribe
- Mute
- Subscribe to RSS Feed
- Permalink
- Report Inappropriate Content
02-28-2023 03:37 PM
This is my workflow.
1. Open up all elements and graphics I plan to use in Photoshop.
2. Make any required adjustments such as colors & if needed put together individual elements.
3. Save all graphics I need as PNG files. If it is something that needs to be together such as a floral arrangement then I save them all together in one PNG. It depends on the graphic and what I will be using it for. Sometimes I will group flowers only and upload the leaves individually so that I can have more flexibility with the final layout.
4. Import into the Zazzle design tool and use as required.
I find it is easier this way. In the past I would design the whole thing in Photoshop and then add the text in the design tool but I would find that sometimes the text wouldn't fit due to the graphics and it was difficult to move them around. I would have to go back into Photoshop and change things and then re-upload.
This way with individual PNGs it is easier to use them on different products especially if making matching products for a collection.
- Mark as New
- Bookmark
- Subscribe
- Mute
- Subscribe to RSS Feed
- Permalink
- Report Inappropriate Content
03-14-2023 09:30 AM
Hi Gail. Thank you for your reply. I'm designing in Photoshop, but exactly as you mentioned, things can look a little off once I move them into the design tool and then I have to take more time to adjust them. I like to use fonts that aren't in Zazzle so that's why I started designing in Photoshop. It take me forever to design a piece though. Thank you again for your post. I'm going to try to streamline things by using your suggestions. Bev
- Mark as New
- Bookmark
- Subscribe
- Mute
- Subscribe to RSS Feed
- Permalink
- Report Inappropriate Content
02-28-2023 07:42 PM
I also work in the Zazzle design tool. I paint/scan/cleanup my artwork in Gimp then design everything in Zazzle. I'm new to an ipad (procreate) and hoping this will help lessen the time it takes to edit my paintings!! 🙂
- Mark as New
- Bookmark
- Subscribe
- Mute
- Subscribe to RSS Feed
- Permalink
- Report Inappropriate Content
03-14-2023 09:31 AM
Oh you paint your own graphics? I wish I were that talented. Thank you for your reply.
Bev
- Mark as New
- Bookmark
- Subscribe
- Mute
- Subscribe to RSS Feed
- Permalink
- Report Inappropriate Content
03-14-2023 10:13 AM
One of the great things about doing it piecemeal is that you don't have to be an incredible artist. At first I REALLY struggled painting my own stuff because composition is challenging for me - especially with watercolors because you only get one shot at it - you can't go paint over part of it like you can with oils or acrylics. I'd get some flowers that looked good, but then the leaves would turn out crappy or in the wrong place or whatever.
But this way I don't have to worry about all that - I just have to come up with a decent rose or sprig of leaves or whatever, and it doesn't have to be perfect because I can clean it up in GIMP. PLUS, you can easily change the colors to create different versions - and since they're separate files it's really easy to change the colors of the flowers separately from the leaves etc.
I sorta felt like I was cheating when I first started doing it this way, but then I realized that people don't really care how you created the image, they just want something that looks nice.
Anyhow, sorry to blather, just saying that you don't have to be super talented to paint your own stuff - and it's SO much easier to just pull out the paints and whip out a [whatever element you might need] than it is to hunt one down, deal with licensing, wonder how many other designers are using it, yadda, yadda, yadda. That's my experience anyhow!
Cat @ ZB Designs
- Mark as New
- Bookmark
- Subscribe
- Mute
- Subscribe to RSS Feed
- Permalink
- Report Inappropriate Content
03-02-2023 12:08 PM
I like to draw out my design first (very rough sketch, I always have a sketch book on me). Then I play with it in Illustrator. When I have the graphics finalized I work on wording and adding anything else I think it may need. After that I save a copy of the finalized artwork, then save everything as individual files to upload to Z. It takes a little longer this way, but makes it easier to go back and change things if needed!
- Mark as New
- Bookmark
- Subscribe
- Mute
- Subscribe to RSS Feed
- Permalink
- Report Inappropriate Content
03-03-2023 05:39 PM
When I first started out I would lay out the exact design to fit inside single Zazzle products, but after a while that became really tedious so I just create separate elements and backgrounds now to mix and match stuff at will. I don't create a lot of original graphics anymore since my carpal tunnel resists that amount of work, and making svg files that can be colored whatever color really helps, especially since I use a lot of round and rectangle images.
- Mark as New
- Bookmark
- Subscribe
- Mute
- Subscribe to RSS Feed
- Permalink
- Report Inappropriate Content
04-10-2023 02:08 PM
Hi there, here's my usual process:
- Create a folder on my PC and name it with the design (helps me keep everything in one place)
- Create design using Procreate on Ipad (hand drawn designs) or Affinity Designer (Windows PC).
- Save designs to folder.
- Upload to Zazzle Designer.
- Play with tiling, filters depending on the design.
- Add customizable text.
- Download Zazzle mockup to PC.
- Upload mockup to Canva and remove background.
- Create Cover using Canva or Affinity Designer.
- Upload Cover to Zazzle for featured image.
Hope this helps 😊
- Mark as New
- Bookmark
- Subscribe
- Mute
- Subscribe to RSS Feed
- Permalink
- Report Inappropriate Content
04-30-2023 08:00 AM
Thanks everyone! I appreciate you taking the time to share your design process. Working strictly in the design tool certainly is faster, I'm finding out. Have a wonderful day.
Bev
